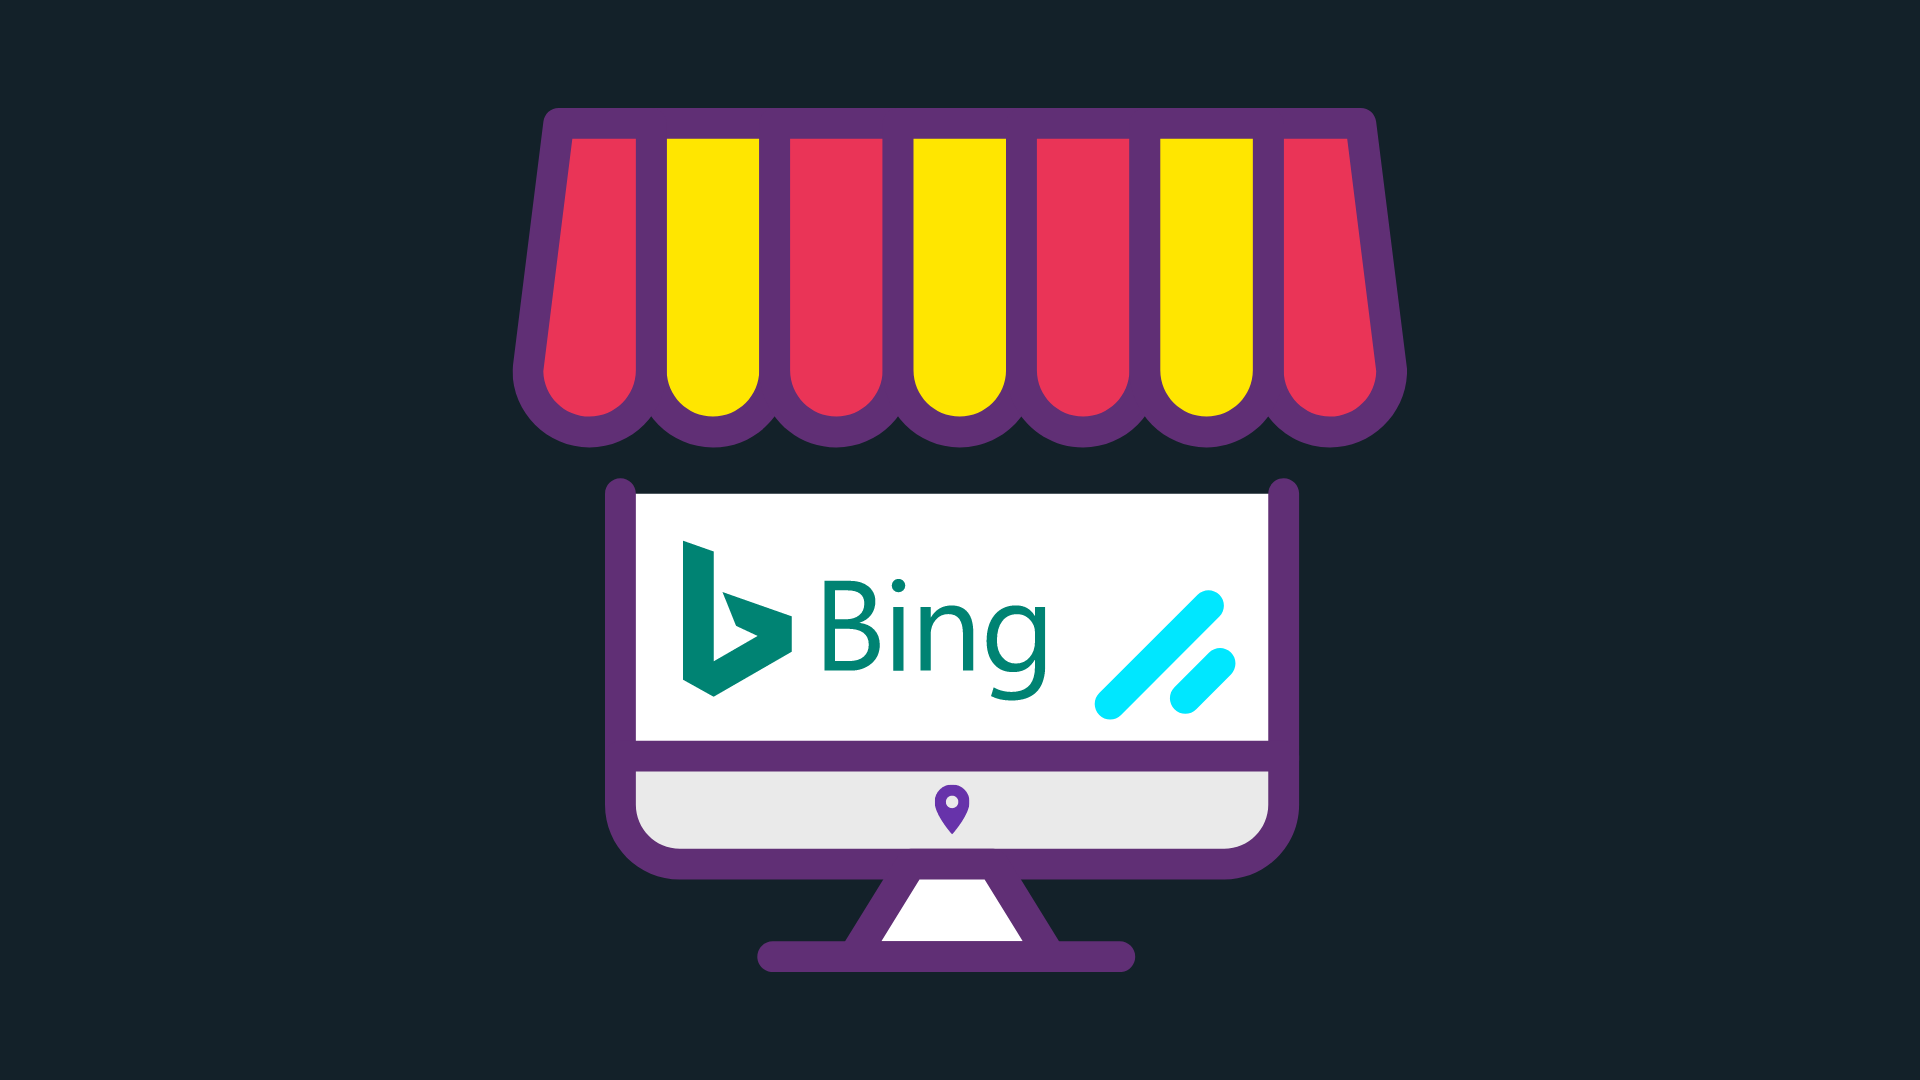
Building your online presence involves creating several listings on different platforms – including Google Business Profile, TripAdvisor and Yelp. But what many businesses overlook is Bing Places for Business – or Bing listings for short. Creating a listing is easy on Bing and it won’t take you more than an hour to add in your information.
Read through our quick guide on how to create a listing on Bing.
[lwptoc linkColor=”#00cd98″ hoverLinkColor=”#008764″]
Before creating Bing listings
First things first: Go to Bing Places.
If this is your first time to claim and verify your Bing listing, you need to have a Google, Facebook, Microsoft or work (company email) account. You don’t necessarily have to link your email to have a Microsoft account, but that’ll help too.
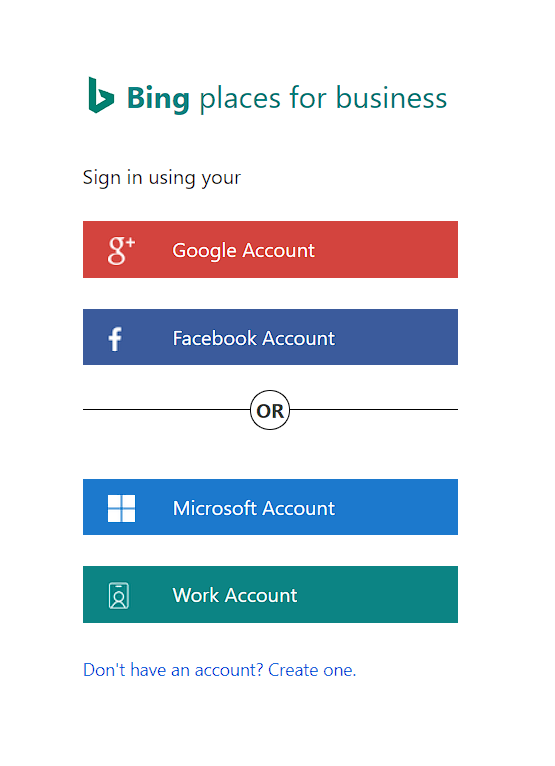
PRO TIP: Make sure that the account you’re signing in with is the one you use to sign in on other online listings. This makes it easier for you to log in across all platforms.
After linking your chosen account with Bing Places for Business, you’ll be prompted to include additional information about yourself so that Bing can reach you should any reason arise.
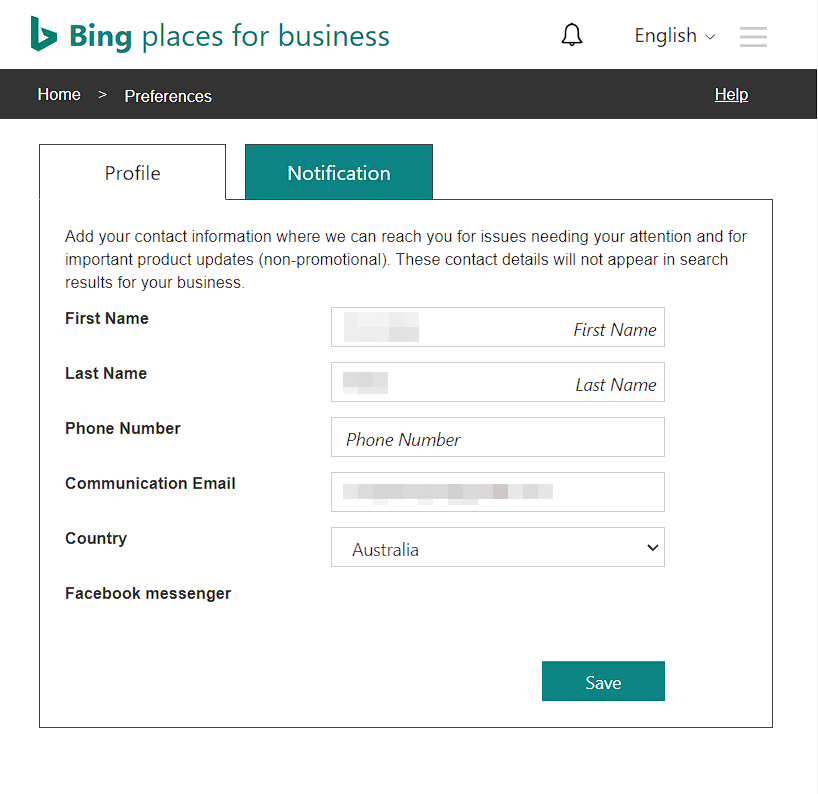
After clicking the Save button, you’re now ready to create Bing listings.
(Finally) Creating Bing listings
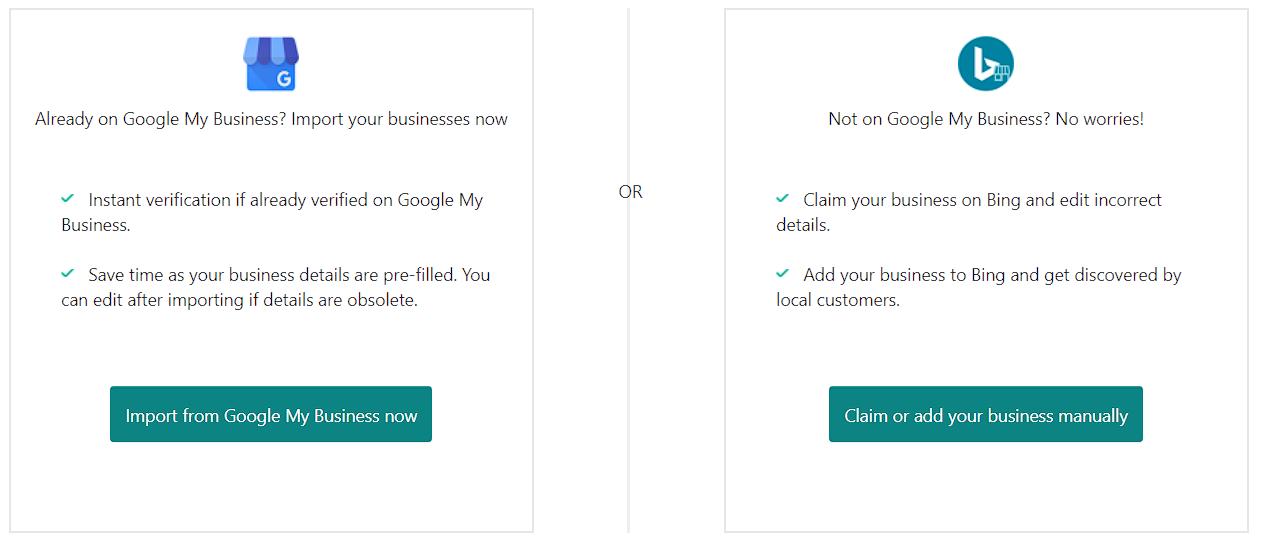
There are two ways to create Bing listings: Manually create them or import them from Google Business Profile (which they still call Google My Business). If you have a GBP, Bing will automatically verify your listing as long as it is also verified on Google. But if you still haven’t made your GBP yet, go ahead and manually create your own Bing listing first.
We’ll discuss manually adding your business first as this entails several steps.
Manually adding Bing listings
1. Claim your listing
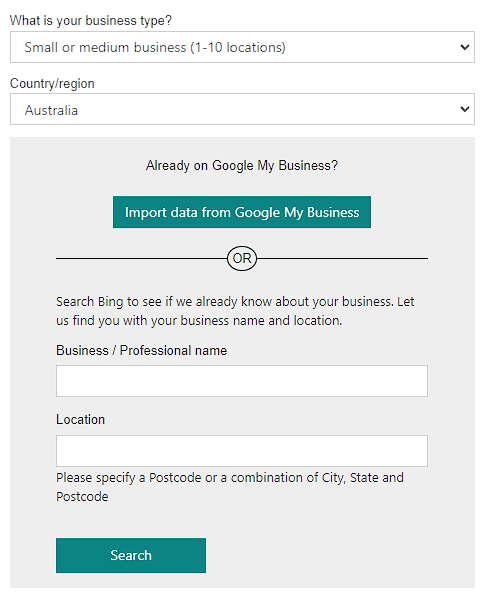
When you click “Claim or add your business manually,” Bing will ask you what type of business you are and what country you’re located in. There are three (3) types of businesses, two (2) of which Bing can list as physical locations on Bing Maps.
- Small or medium businesses (SMBs) – less than 10 locations
- Chain businesses – more than 10 locations (ideal for multi-location franchises and retail stores)
- Online business – Bing will not allow you to continue creating a listing
You’ll also notice a fourth option – “I manage business listings on my client’s behalf.” This is for digital marketing agencies that manage SEO for businesses.
Bing will ask you again if you have a Google Business Profile and import data from it if you do. If not, you can type in your Business Name and location underneath. Afterwards, click Search.
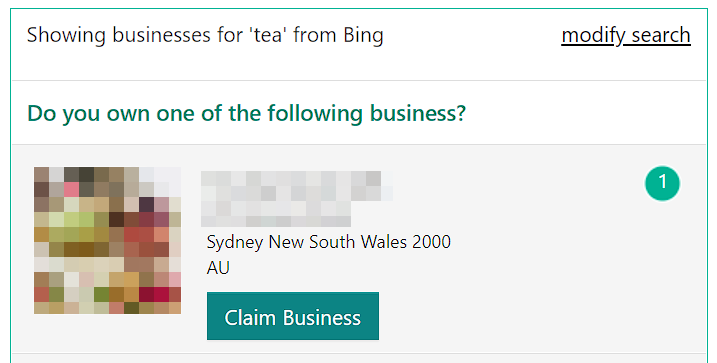
2. Search for your business
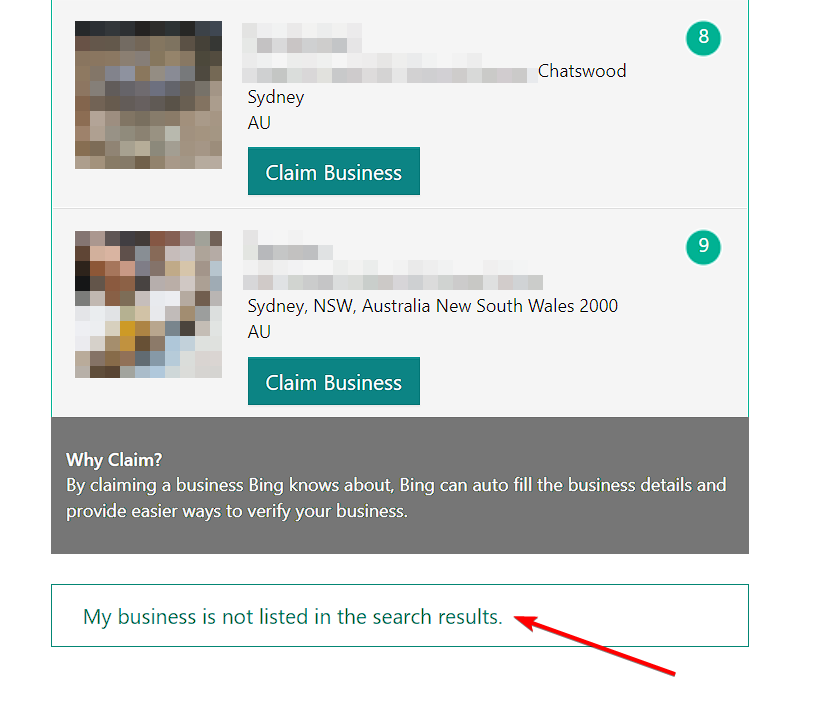
Clicking Search lets you sift through several Bing listings. If one of them is your location, you can click Claim Business.
On the other hand, if your business is not on the suggested list, click “My business is not listed in the search results” at the bottom of the page. You’ll have the choice to create a new business or modify your search. If, after several tries and your business still does not appear on the search results, you can choose to create a new business.
3. Create a new business listing (Basic Info)
Directions here are straightforward: Fill out the form with your business name, phone number and address. You may need to relocate your map pin where you’re exactly located. When you’re done, press Next.

4. Add category information
You’ll need to identify what type of business you are in order to appear on relevant user search results – this is done by selecting your Segment of Business (commonly known as verticals or sectors) and categories.
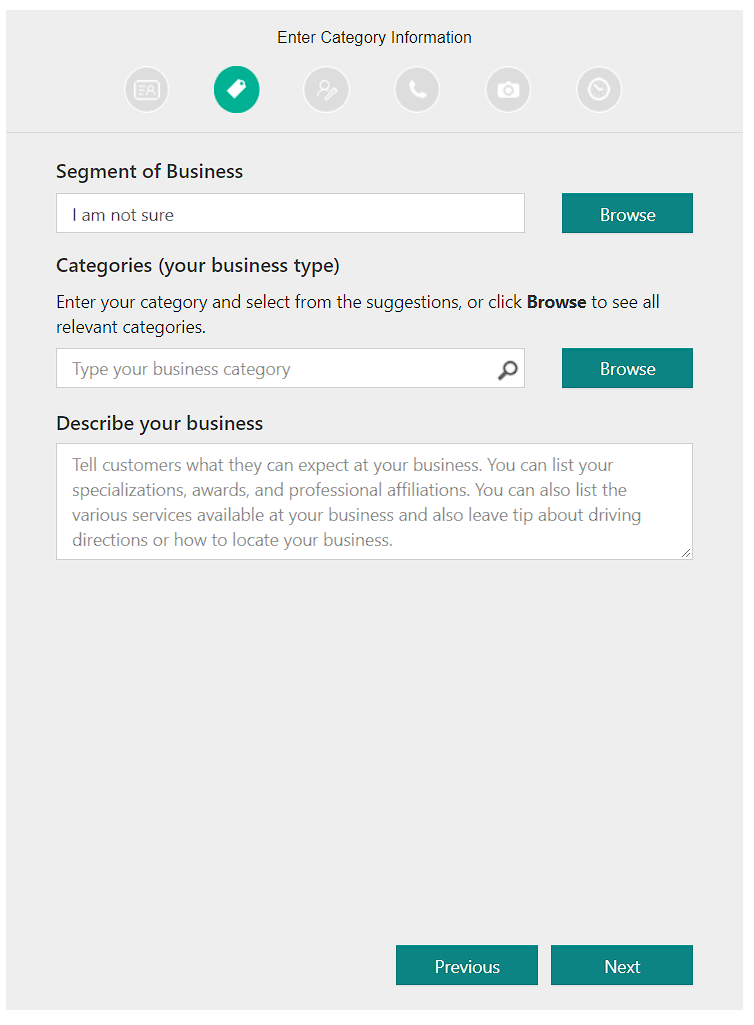
Select which segment of business you belong to:
- Arts & Entertainment – art galleries, museums, amusement parks, concert venues, casinos, theatres, etc
- Banking & Finance – banks, ATMs, financial centres, accountancy firms, insurance companies, loan offices, etc
- Business-to-Business – advertising companies, marketing agencies, suppliers, etc
- Education – schools of all levels, tutorial centres, dance classes, etc
- Food & Drink – restaurants, bars, pubs, cafes, catering services, tea rooms, wineries, etc
- Government & Community – communal services, facilities, centres, organisations, cemeteries, etc
- Healthcare – hospitals, clinics, aged care home, addiction treatment centres, etc
- Professionals & Services – professionals, vehicle dealers, sports facilities, repair centres, real estate, etc
- Religion – places of worship, convents and monasteries, missions, etc
- Retail – apparel stores, bookstores, hobby stores, home & garden stores, malls, shopping centres, etc
- Travel – agencies, hotels, accommodations, bus and train stations, airports, taxi services, car rentals, etc
If you are not sure, select “I am not sure.”
Once you find the right segment of business, click Done. If you selected “I am not sure,” you can manually enter categories.
Afterwards, you can select the categories that best fit your business. You can either type down categories (1) or browse through a list, depending on your segment of business (2). After selecting categories, choose which one should be your primary category (3).
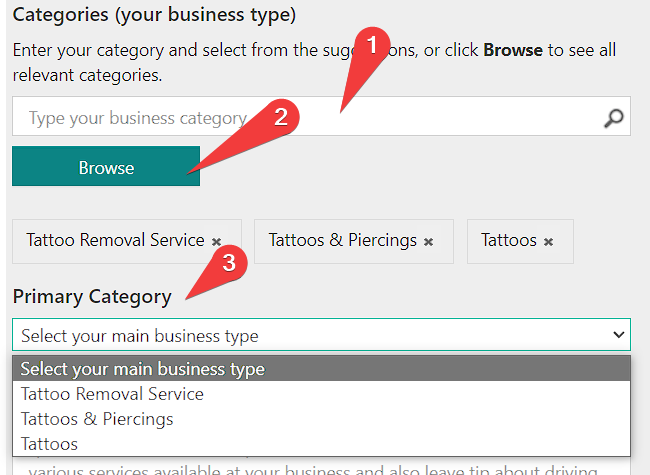
Finally, write a brief business description that lets people know what to expect from your business. When you’re done, click Next.
5. Select additional business details
In this section, you can choose to display your address or not. Service area businesses are recommended not to show their addresses if they visit residential or commercial areas. In that case, Bing will only show the city, region, postcode and country initials.
You can also select if you are a professional or a business. Here’s the difference:
- Professional – you are a practitioner with a physical location (i.e. dentist)
- Business – you are selling products within a physical location (i.e. retail store)
6. Add contact details
This step is straightforward: add in your email address, social media URLs, as well as other online listings. This step is optional. You can click Next if you have none of these.
7. Add photos
Another straightforward step: upload up to 100 photos of your location, products and staff members. Like step 6, this is optional. Click Next when you’re done or have no photos to upload at this time.
8. Select working hours
You have the option to show your business hours on Bing listings, or simply state that you are open 24/7. Depending on your store operations, choose the best one.
If you chose “Show business hours,” you have to indicate your trading hours. You can choose to add more if you close for a period of time, as some restaurants do.
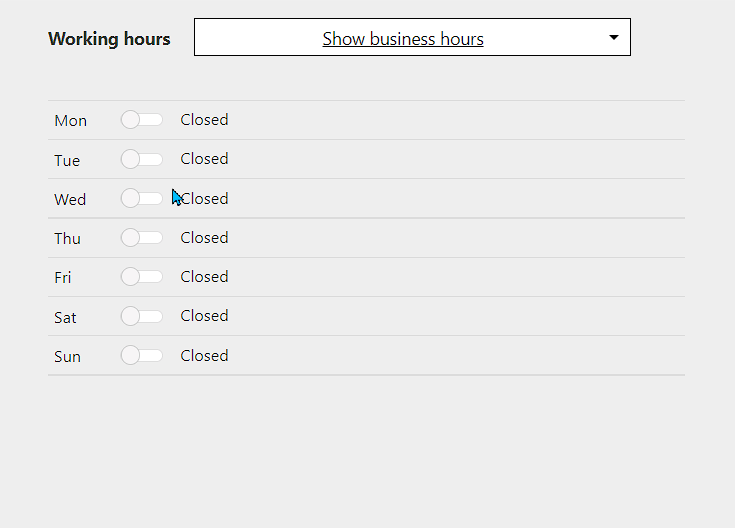
On the other hand, if you choose “We are open 24×7,” you don’t have to pick any schedule and Bing will indicate that you are open all the time.
You can also choose to skip if you do not want to show your trading hours.
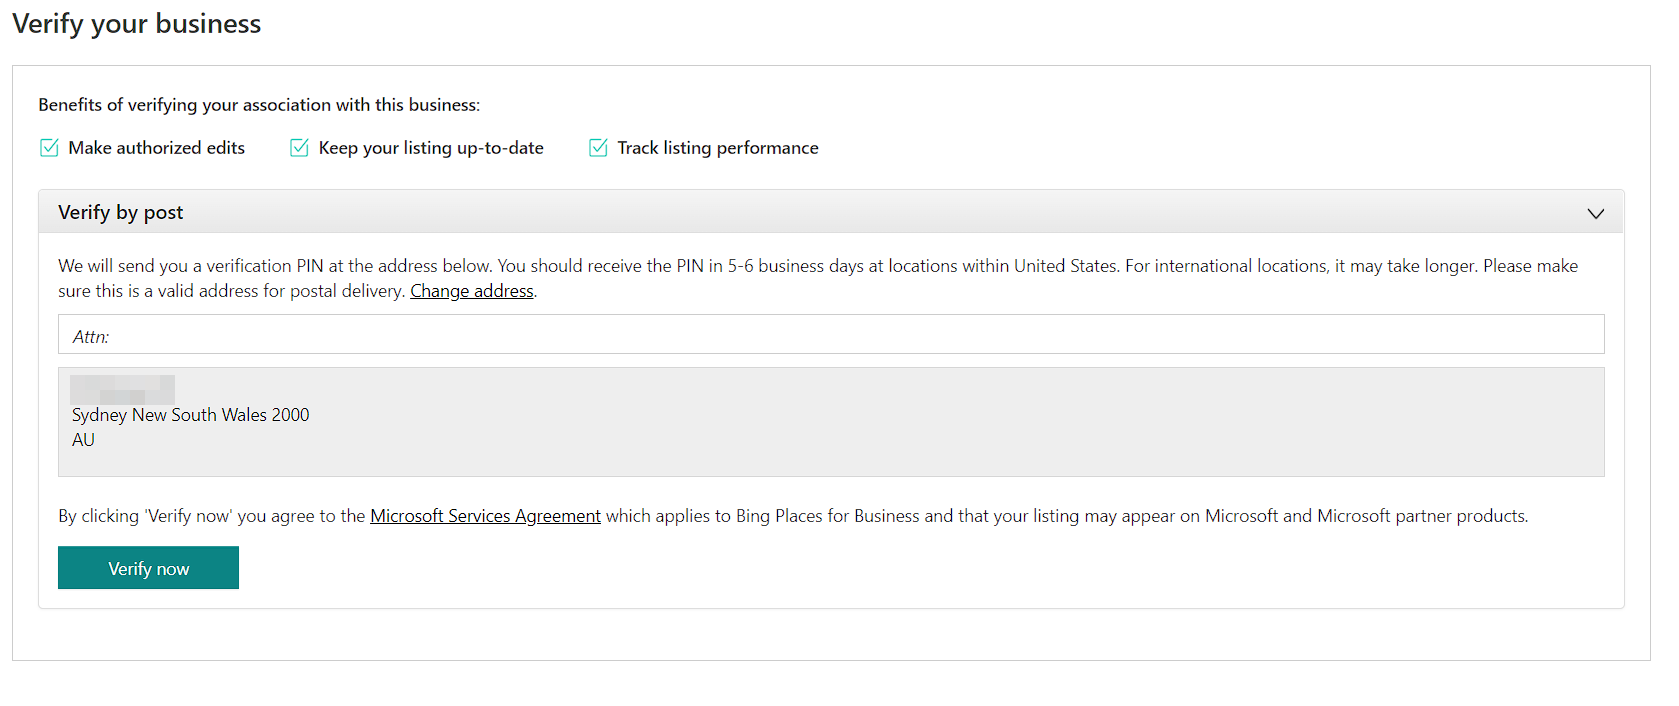
9. Verify your listing
After filling out your business details, you can verify via Post. Like Google Business Profiles, you will be sent a verification PIN to your business address. This may take longer than a week for non-US addresses.
After verifying your listing, you may have to wait for a few weeks for your listing to go live. Ideally, it should go live within two weeks, but sometimes it will go live after a month or so.
But once your listing is live, you can see all your business details, as well as reviews pulled from other platforms.
Importing data from Google Business Profile to create Bing listings
To create a Bing listing using your GBP data, click “Import data from Google My Business.”

Afterwards, click “Continue to Google My Business.” You’ll have to connect the Google account with your verified Profiles.
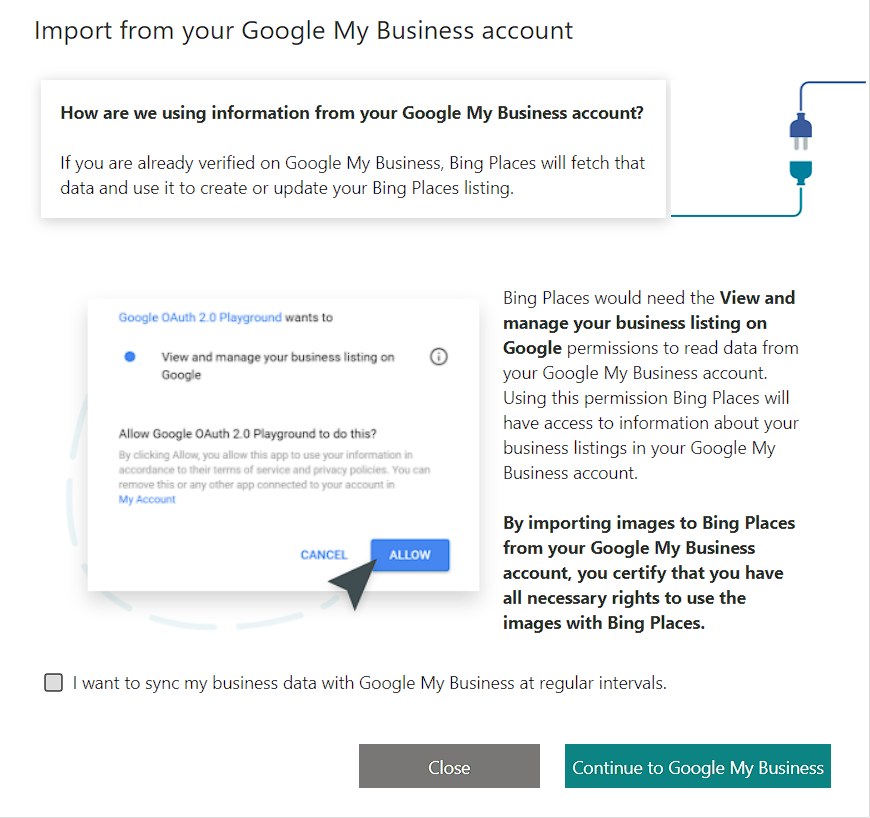
Select the Profile you want to connect with your respective listing and it will also be verified and live on Bing.
You can read more about the major benefits of having a Bing Places for Business listing we wrote a few weeks back.
Local marketing made easy on the DigitalMaas Platform
Taking care of too many listings on different platforms can be a daunting task – that’s where the DigitalMaas Platform comes in. Our technology can help you connect your Bing listings and Google Business Profiles together and make sure your information is complete and accurate across all listings. Talk to our team to show you how this works.

